

Newsletter zu Aktionen
Trage dich ein um keine Aktionen von uns zu verpassen.
Wir senden 1-2 E-Mails pro Quartal.
 Zum Inhalt springen
 Let’s take a hands-on approach and walk through the process of registering an app and setting everything up for our application in Microsoft EntraID to gain a better understanding of app registration.
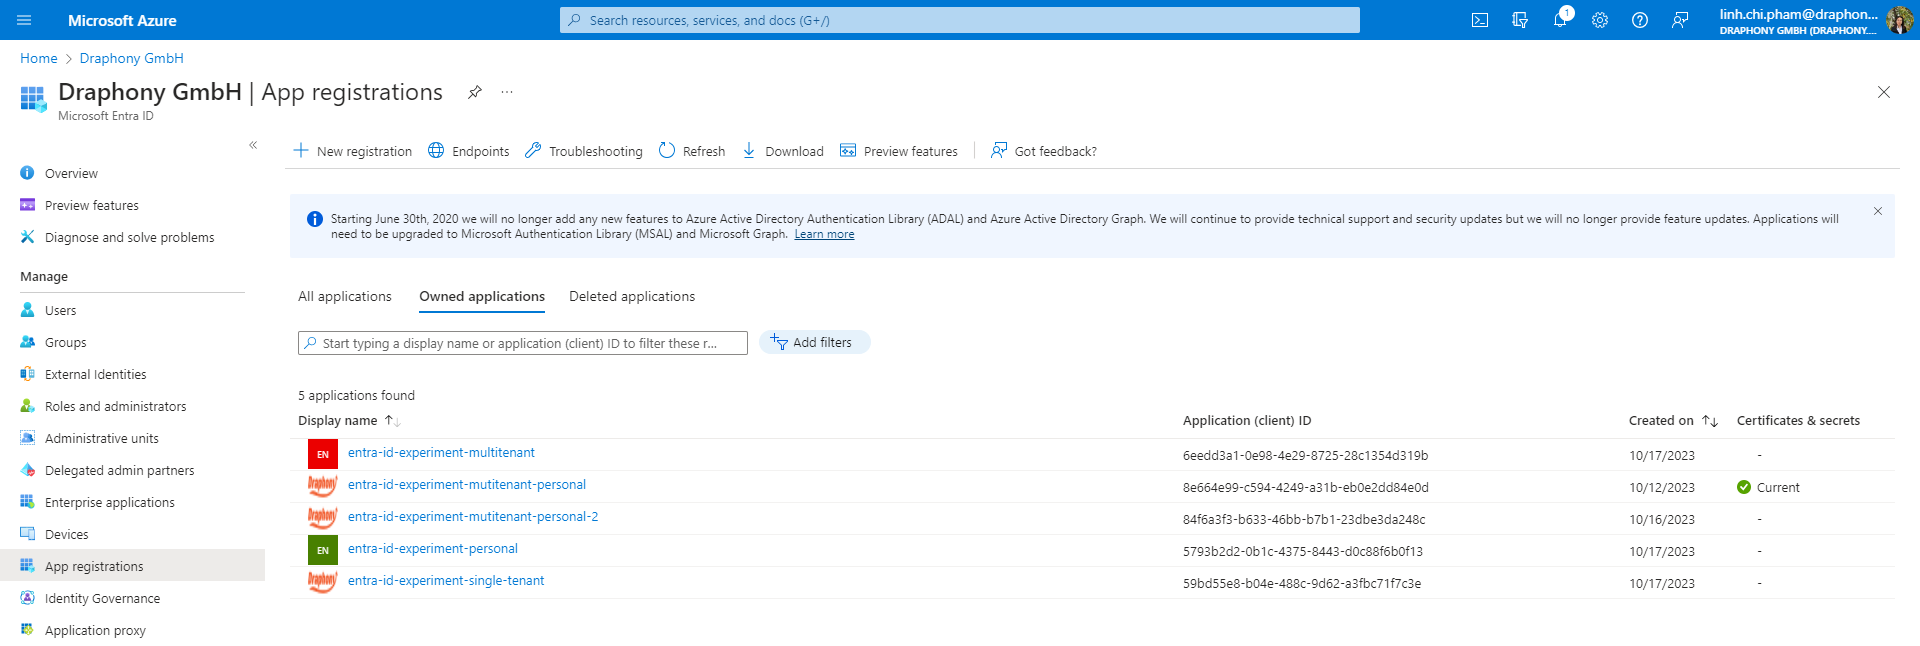
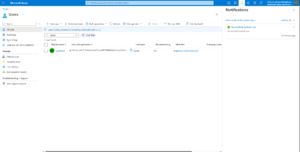
Click New Registration to register a new application. We’ll call it zeroti.
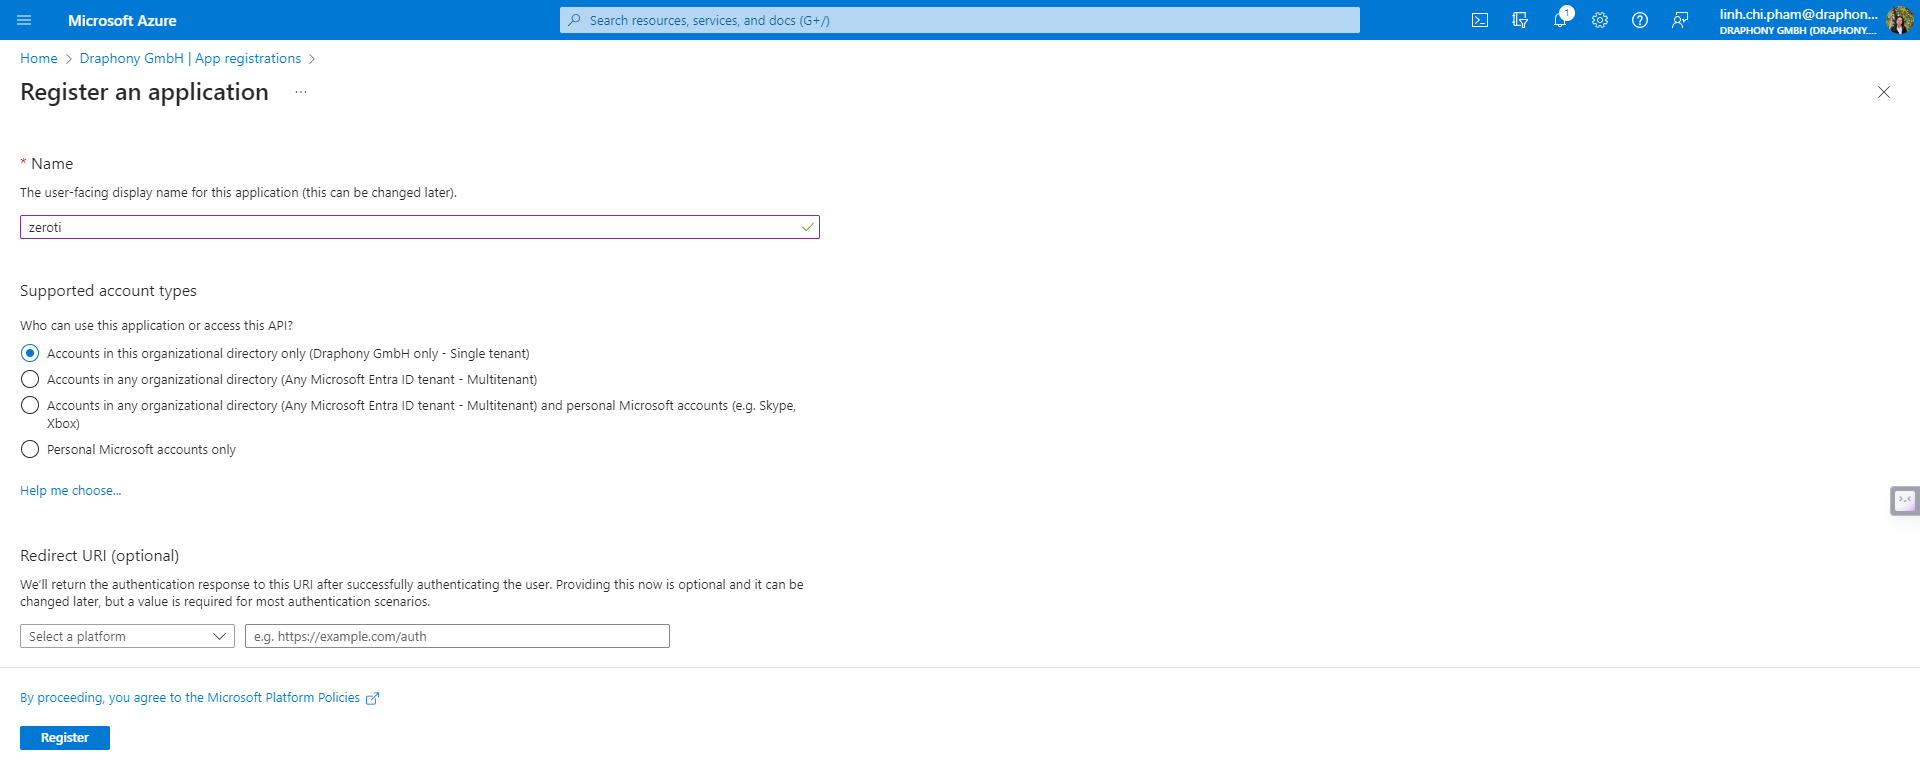
These are supported account types:
Single tenant only support for accounts in a current organization (You cannot sign in with an account from another organization or personal account).
Multitenant will support accounts in any organization (You cannot sign in with a personal account).
Multitenant and personal will support accounts in any organization and personal account.
Personal only support for personal accounts.
We will use a single tenant to test.
We can set up redirect uri later.
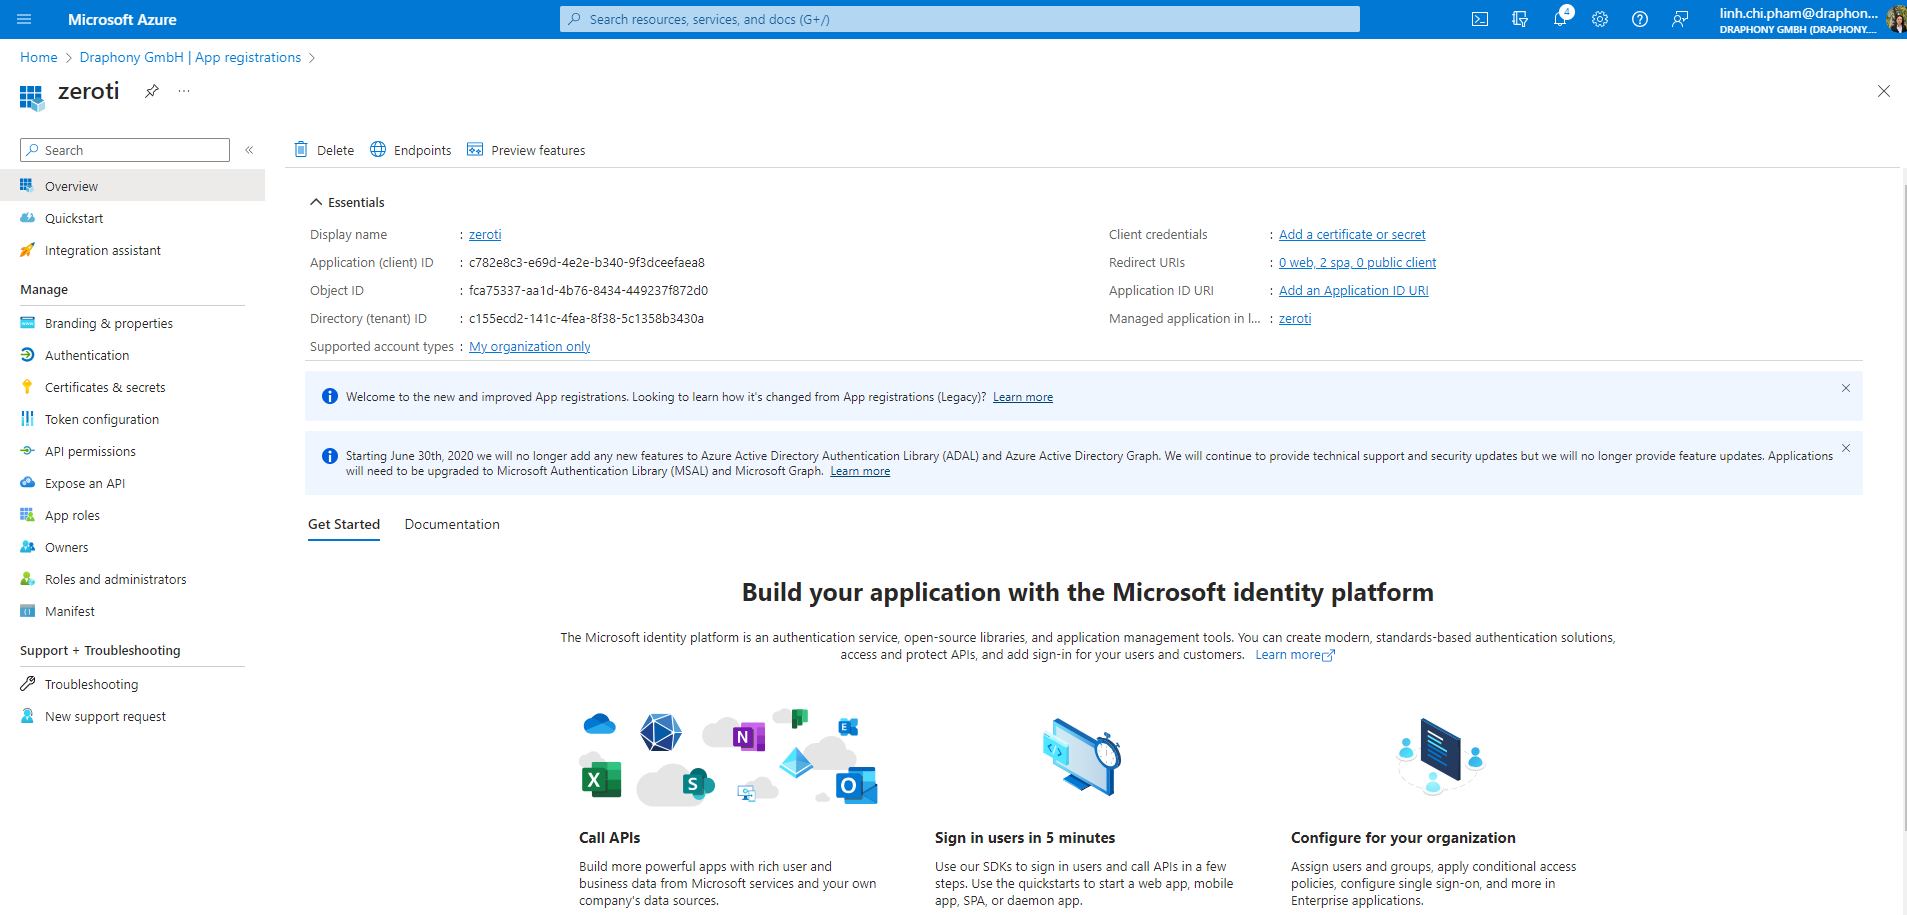
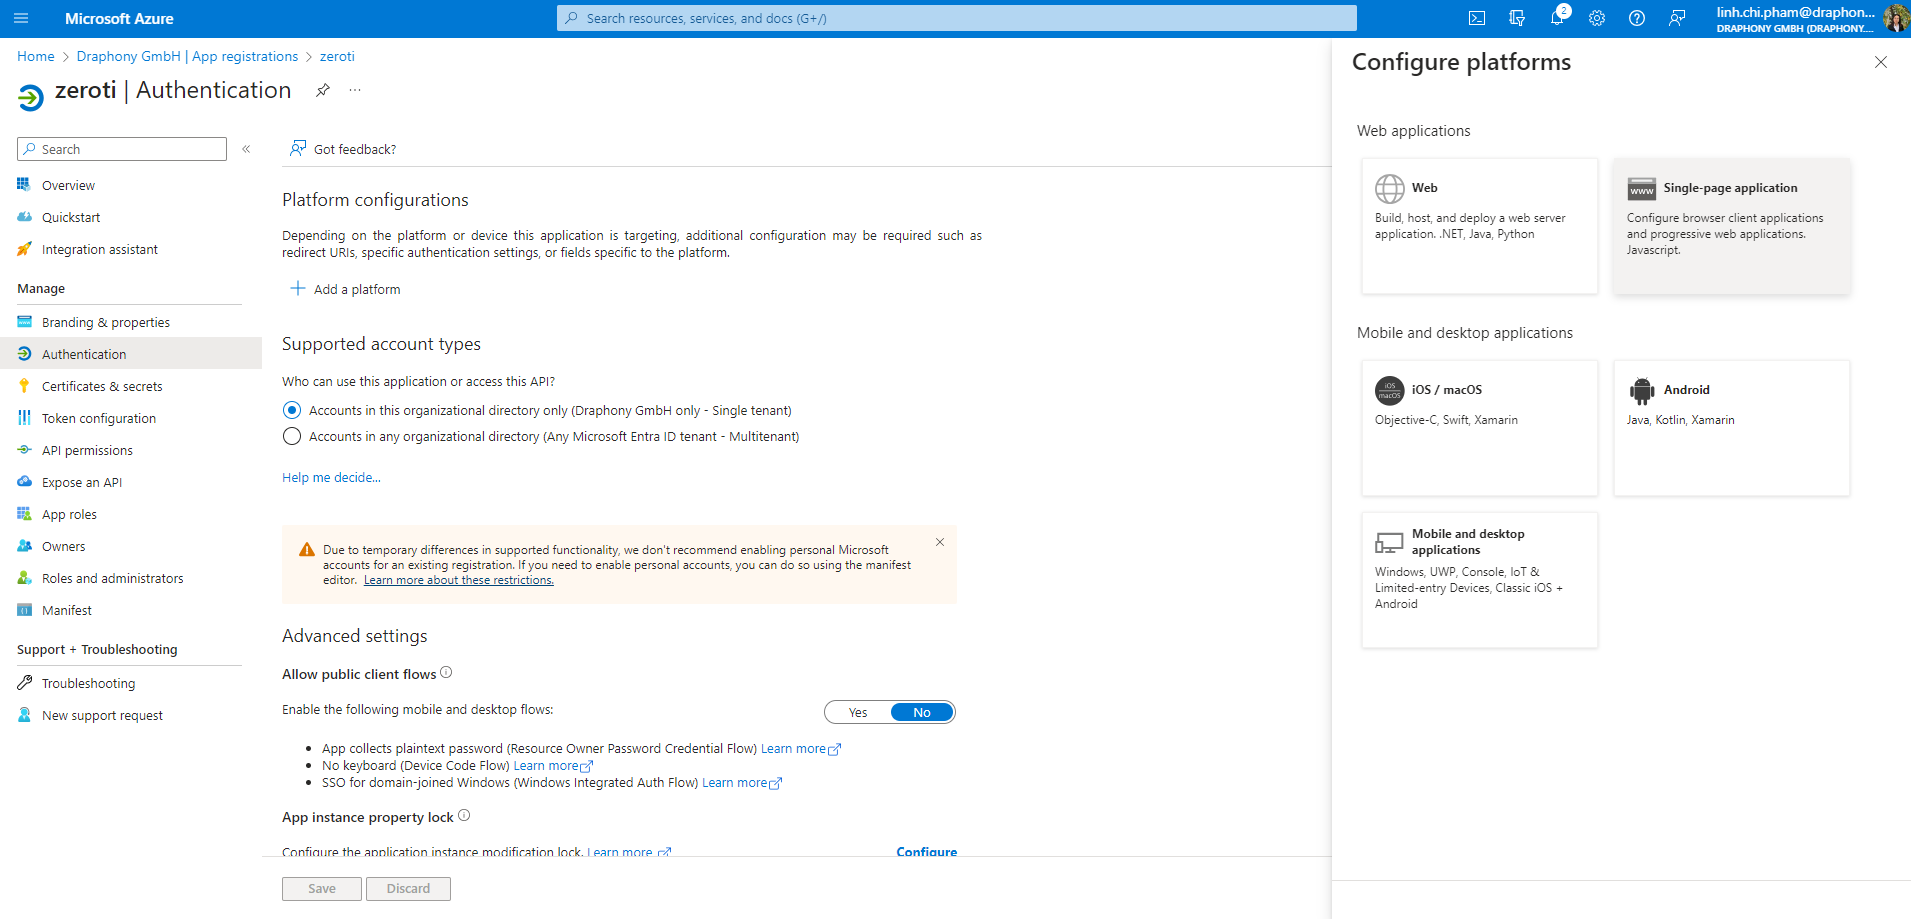
After registering, we will be redirected to the Overview page. To enable authentication for our application, we need to go into Authentication and configure:
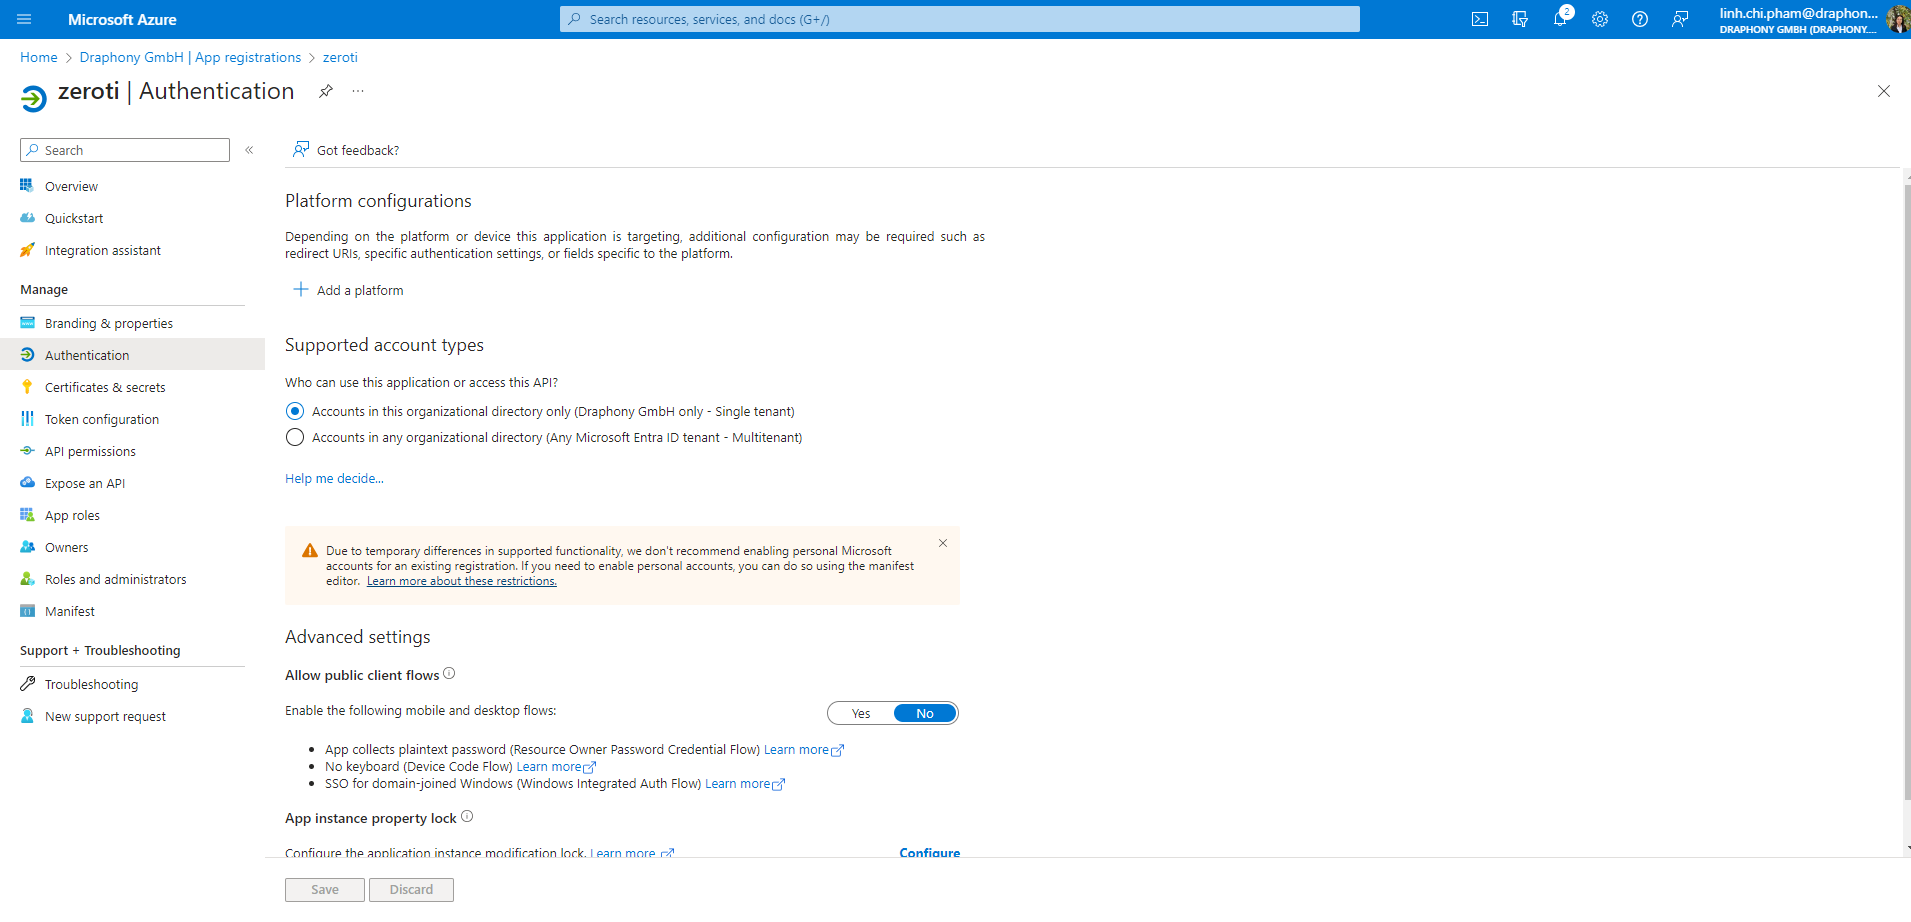
Our application platform is SPA using ReactJS so we choose a single-page application:
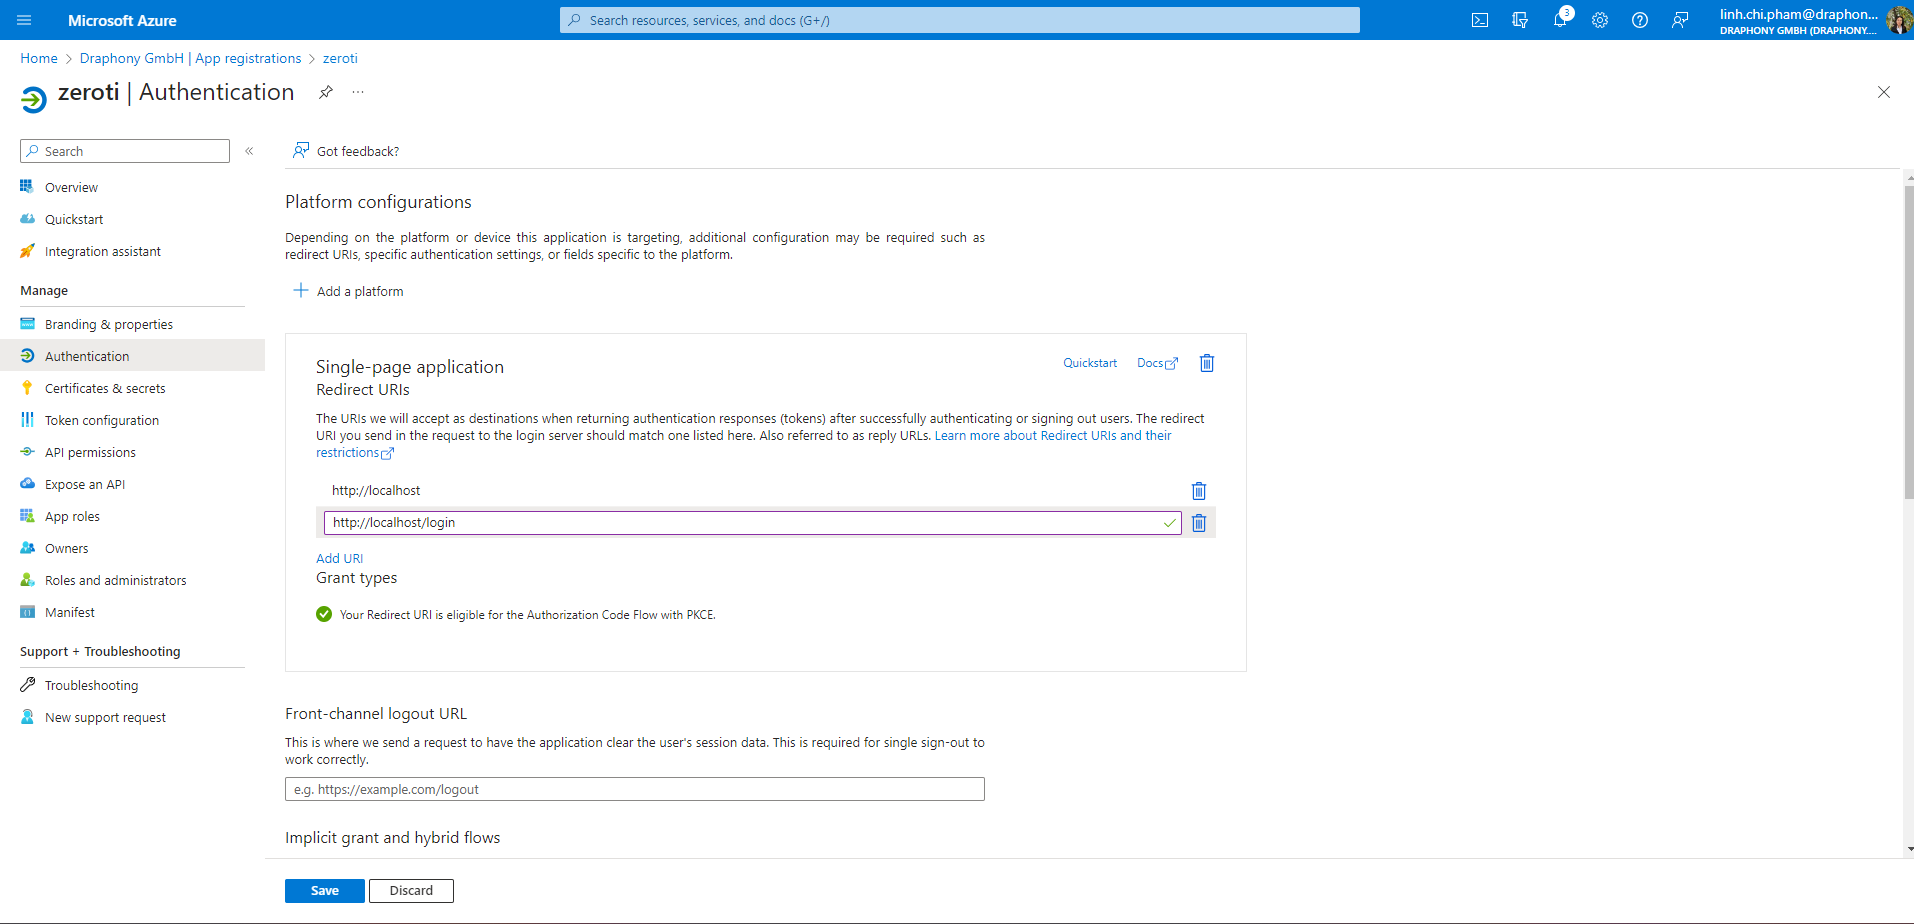
We will let our app redirect back to the home site (we are testing in our local environment so the link is http://localhost).
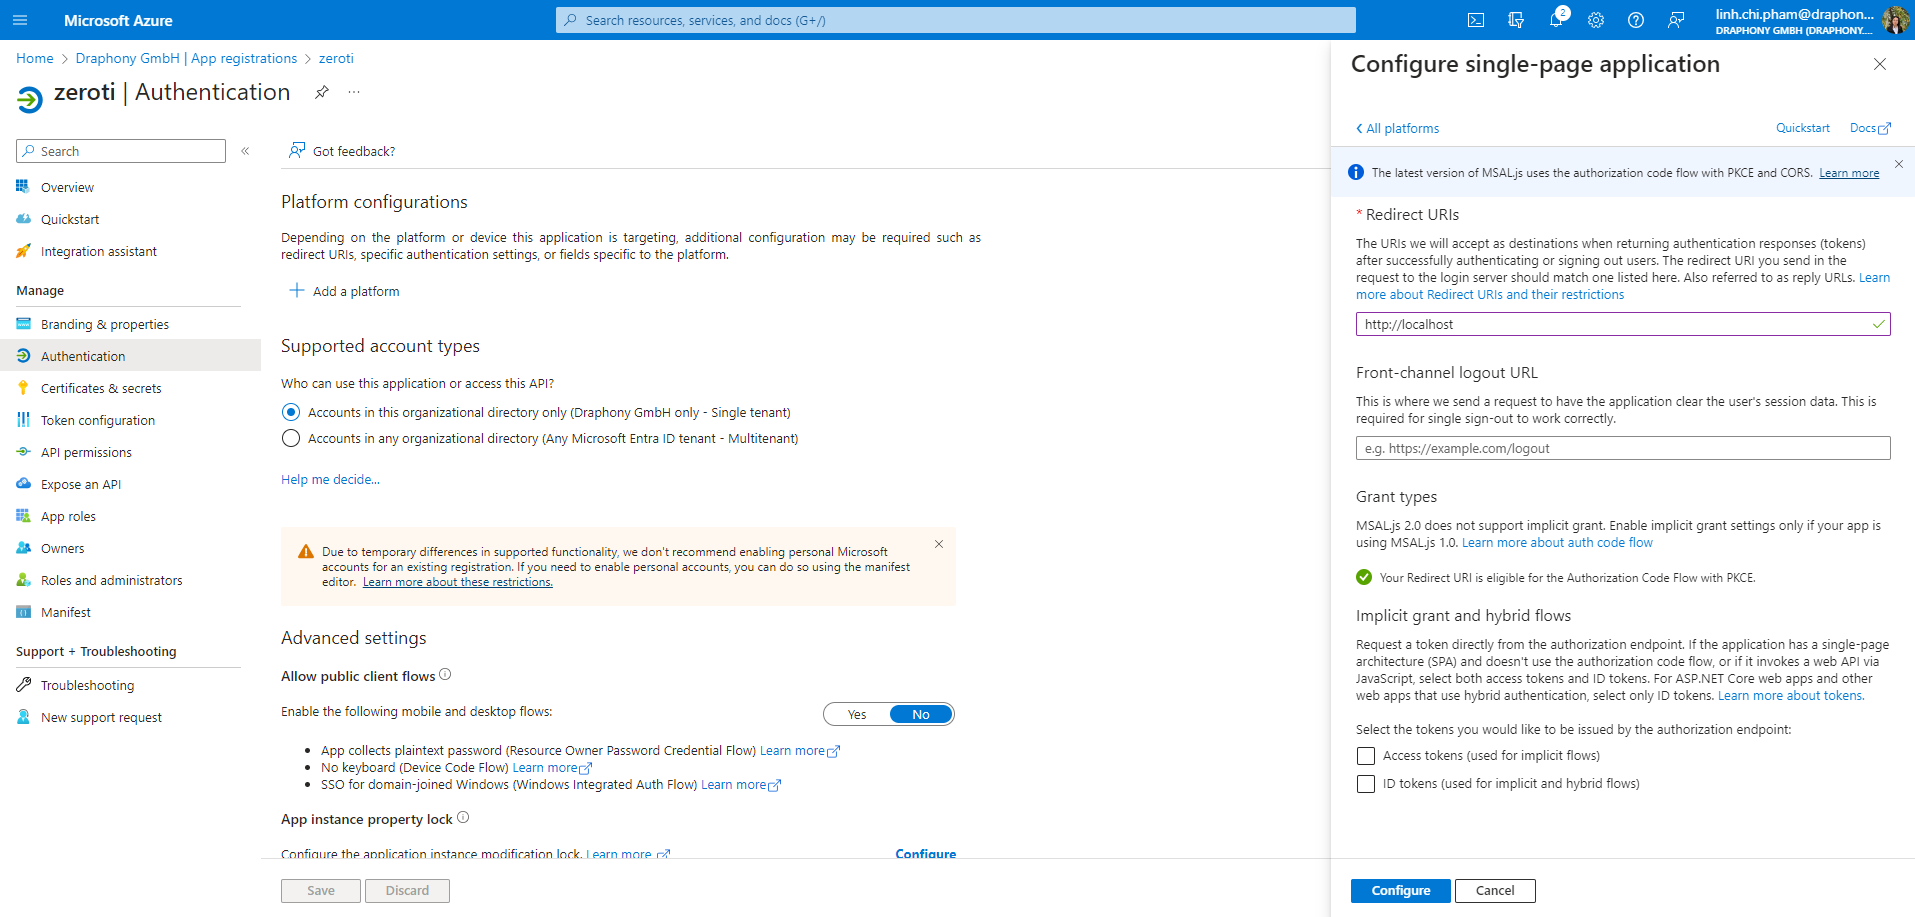
We can also add more redirect URIs after configuring the platform, we will add http://localhost/login to test our redirect login page.
Git clone a SPA app from Azure Repo:
git clone https://DraphonyConsulting@dev.azure.com/DraphonyConsulting/BauerAG-AzureAD-DeepDive/_git/lab-1-spaCopy the .env.example to .env and replace environment variables to suit the application information we have configured on Azure.
REACT_APP_SCOPES=user.read
REACT_APP_CLIENT_ID=c782e8c3-e69d-4e2e-b340-9f3dceefaea8
REACT_APP_AUTHORITY=https://login.microsoftonline.com/draphony.com
REACT_APP_REDIRECT_URI=http://localhost/login
REACT_APP_POST_LOGOUT_REDIRECT_URI=http://localhost/
Scopes is the level of access and permissions that are granted to grant access to the application.
Client ID (Application ID) is an identifier for your application to be authenticated by Azure.
Authority is the endpoint to authenticate your application ID.
Redirect URI is the link that will be responded to after we login successfully.
Post logout redirect URI
npm install npm startOur app is running on port 80. Visit http://localhost

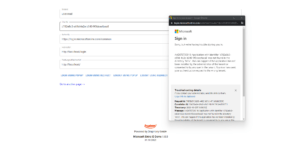
Since our application authentication is for a single tenant. Let’s try to sign in:
Login using Popupauthority: https://login.microsoftonline.com/common (this only works for multi-tenant app).
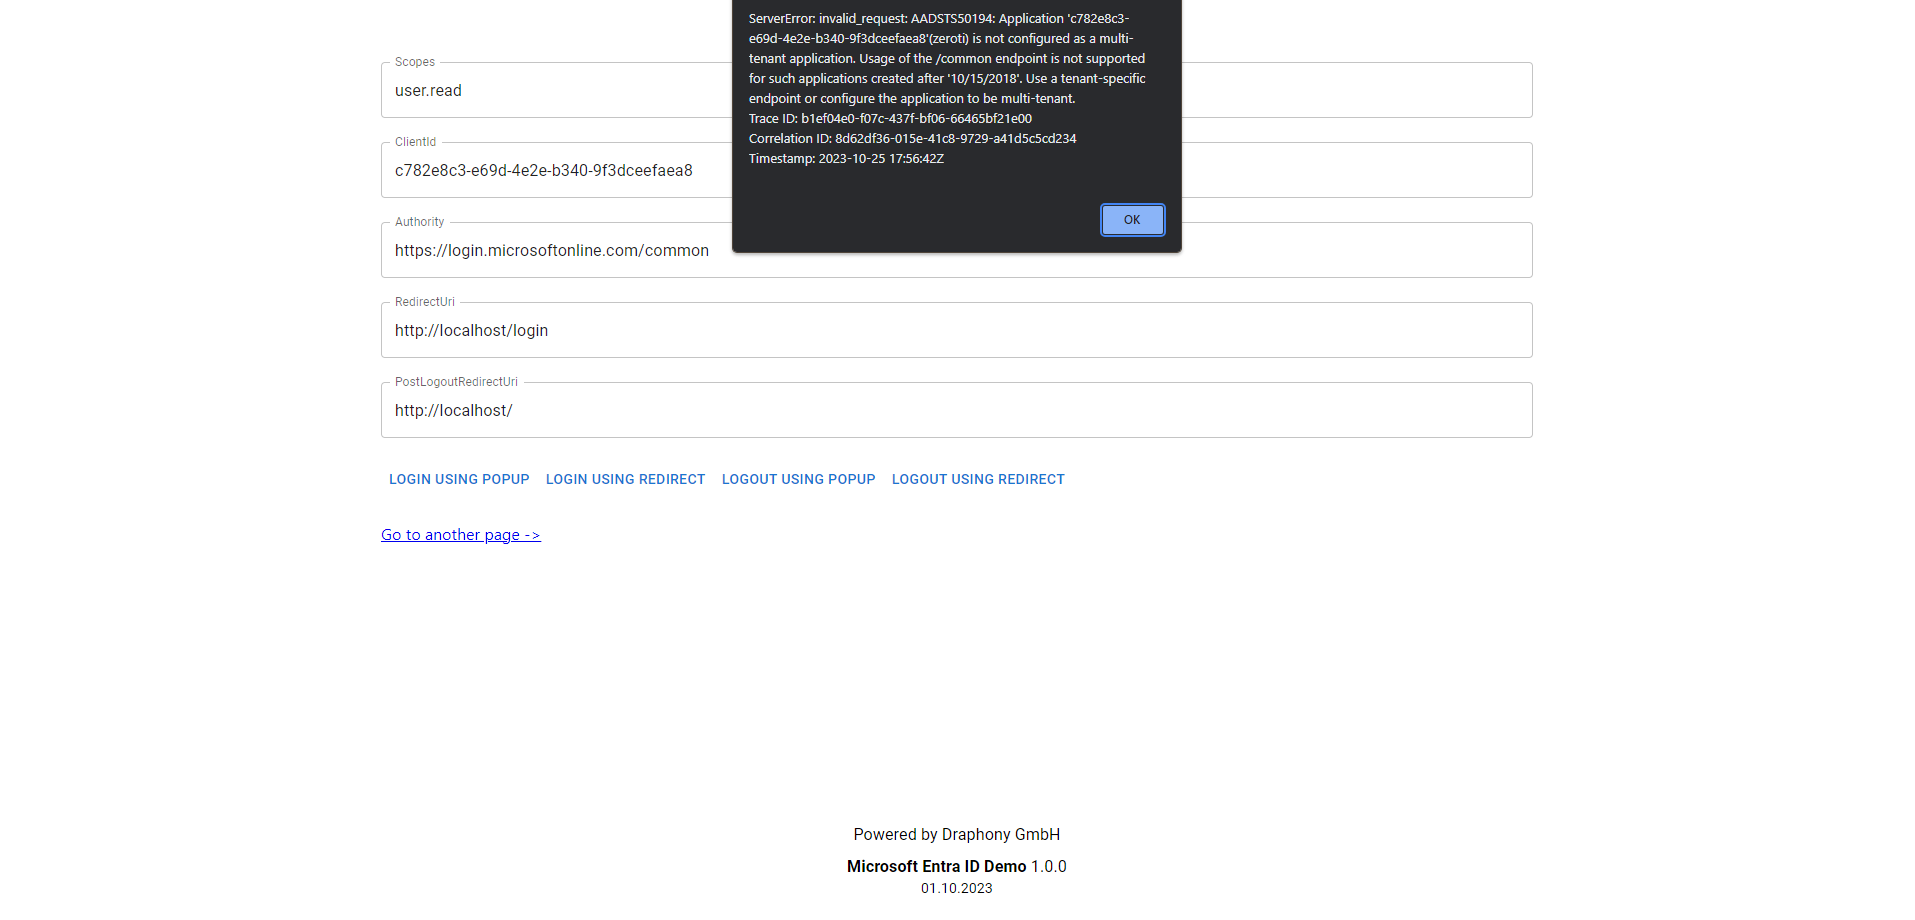
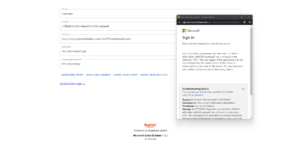
Login with our organization account (not working, should work with multi-tenant, usage of the /common endpoint is not supported for such applications created after ’10/15/2018′. Use a tenant-specific endpoint or configure the application to be multi-tenant).

Login with another organization account (failed).
Authenticate by clicking Login using Redirect and Authenticate Silently.
Set authority: https://login.microsoftonline.com/draphony.com
Login with our organization account (worked).

Login with another organization account (failed).
Add another organization account as a guest user to our organization account.
Set authority: https://login.microsoftonline.com/common (multi-tenant).
Login with the guest user (failed).
Set authority: https://login.microsoftonline.com/mtv119.onmicrosoft.com

Login with our organization account (failed) (Selected user account does not exist in tenant mtv119.onmicrosoft.com).
Login with the guest user (failed) (App ID not found).
Set authority: https://login.microsoftonline.com/draphony.com
Login with our organization account(worked).


Login with the guest user (worked).
Change application to multitenant.
Now let’s go to Azure and change our application in the Authentication page into multi-tenant and see what will happen.
Set authority: https://login.microsoftonline.com/common (multi-tenant).
Login with our organization account (worked).
Login with the guest user (worked).
Set authority: https://login.microsoftonline.com/mtv119.onmicrosoft.com

Login with our organization account (failed).
Login with the guest user (worked).
Set authority: https://login.microsoftonline.com/draphony.com
Login with our organization account(worked).
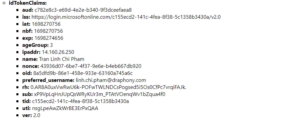
After logging in successfully, we’ll receive tokens:
ID Token

Access Token

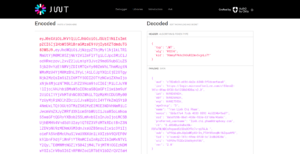
We can try decoding these tokens by using jwt.io:
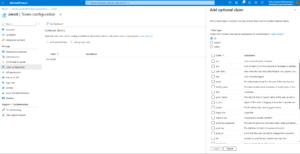
In addition to the default claims provided, we can configure optional claims on Microsoft Azure: Home > App Registrations > <app-name> > Token Configuration
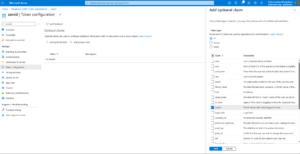
We will try to get the ip address claim of ID token:
Remember to logout and login again since our application stores the old tokens.
Where is the refresh token? In our application, we use MSAL-browser acquireTokenSilent. This will automatically take care of refresh token (if the access token is expired or not existed, it will request a new access token by refresh token from Azure AD). We can still see the refresh token if we go into the Network tab in devtool (F12).

Try getting personal information by using Graph API:
Click GO TO REDIRECT PAGE and GET DATA FROM GRAPH API

You will see your account data from Graph API. But, if you want to get more data, we will need to create more scopes

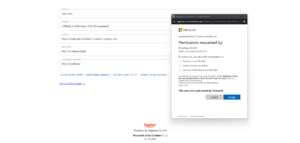
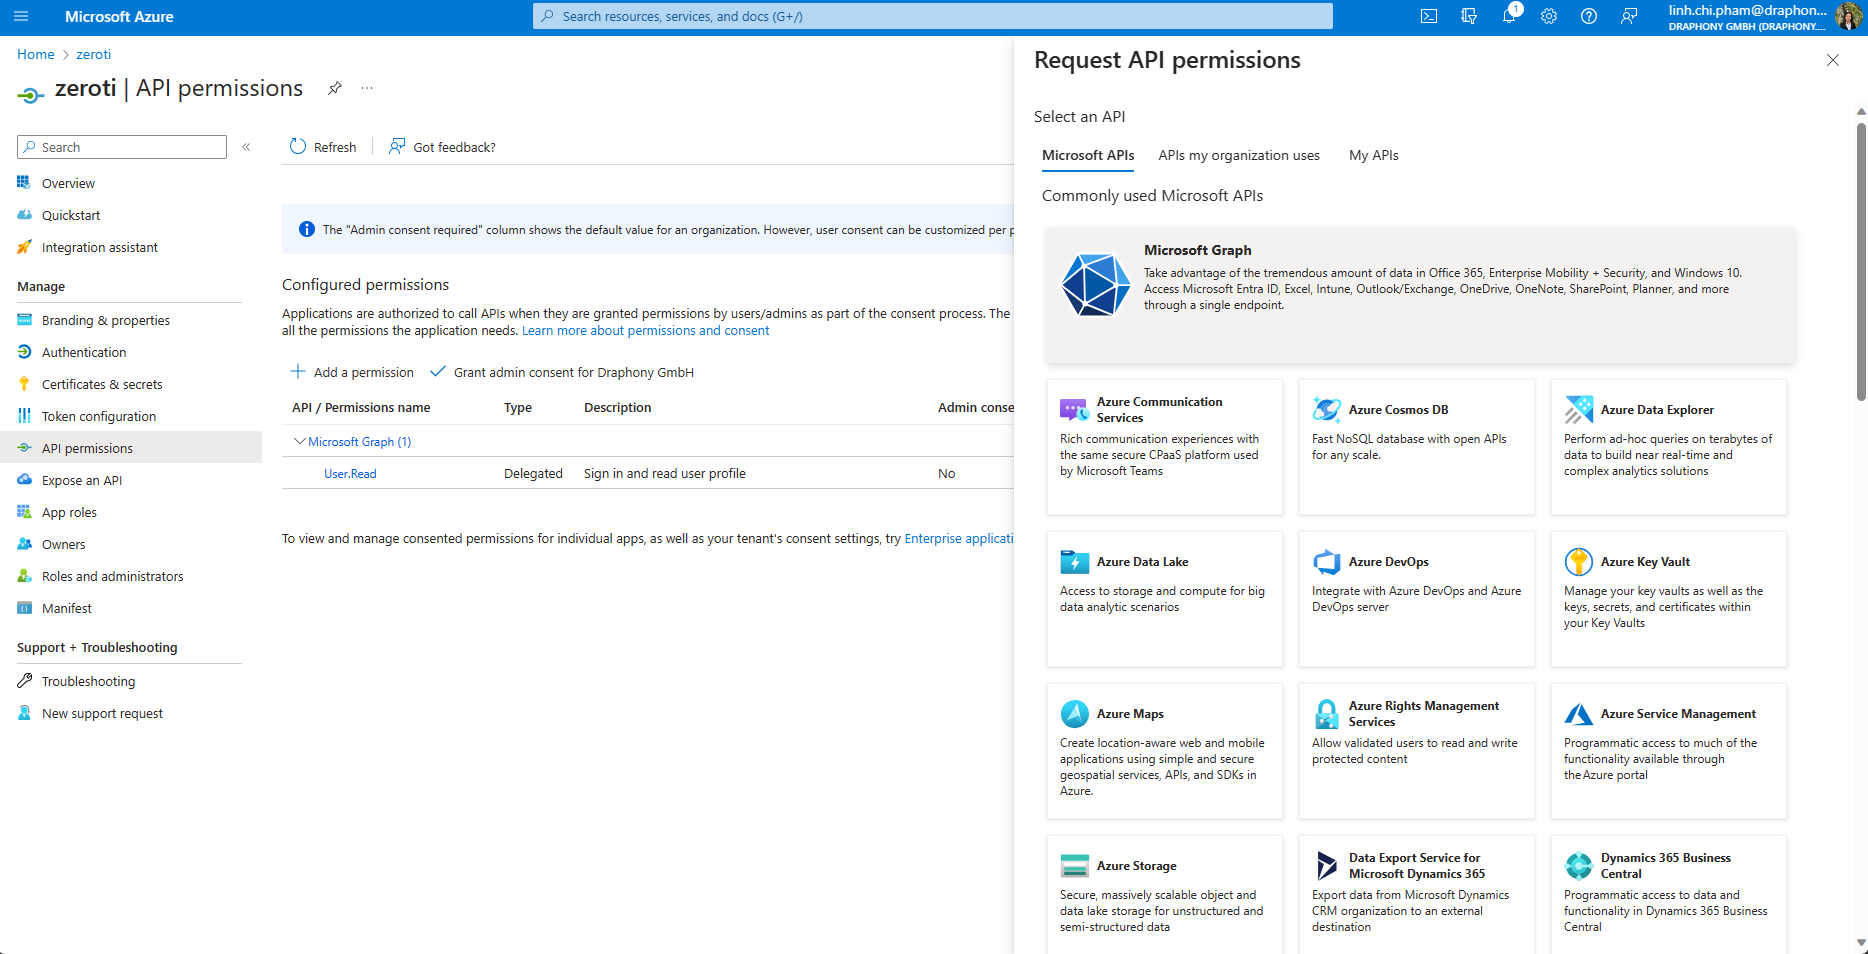
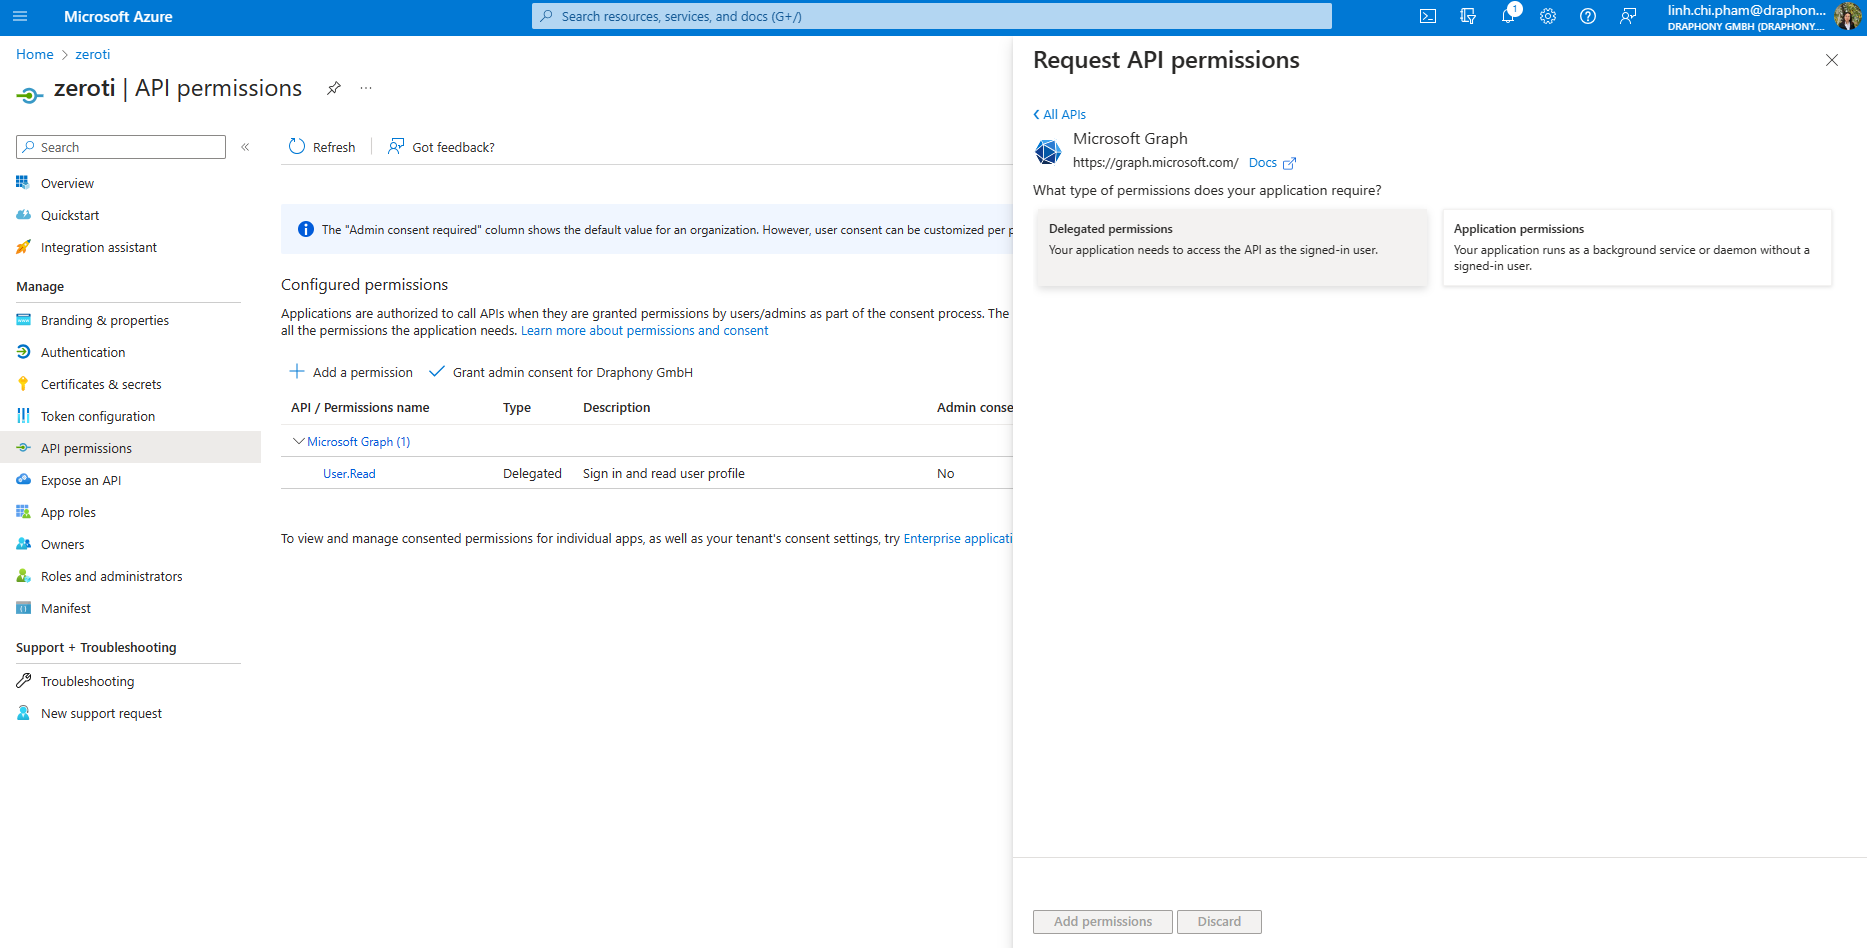
If you go to API permissions, you will see that you only have permission for user.read.
Click add a permission, Microsoft graph -> delegated permission -> select the scope you want like user.read.all, mail.read and add permission.


Remember to log out and then add scopes, split by , and then sign in again.

After adding scopes, the auth information we get back will have more scopes, including those we’ve added. Use these scopes and change the endpoint to https://graph.microsoft.com/v1.0/me/messages, we will get emails.

Try to change the endpoint to /calendars:

Try to change the endpoint to /users:

Try to change the endpoint to /manager:

Whether or not you have granted admin consent, you can still use the scope. However, if you haven’t granted consent, it will prompt you during login, and if it’s granted beforehand, it will log in automatically.
After adding additional scopes, you will be able to access other endpoints, and the scp claim in the access token will change.
Authors
Trage dich ein um keine Aktionen von uns zu verpassen.
Wir senden 1-2 E-Mails pro Quartal.